Skip to main content Skip to footer
We see this question come up on almost every control panel or enclosure project. The part arrives with the right dimensions, the right finish — and then the marking spec is either left blank or underspecified, and the supplier makes a call you didn't approve.
The right marking method depends on your part geometry, durability requirements, and color needs. Screen printing suits flat panels with brand-accurate colors. Pad printing handles curved or recessed surfaces. Laser marking is the only permanent, traceability-grade option for industrial or regulated environments. Each method has a different cost, lead time, and quality risk profile.
Here is a breakdown of when to use each method, how to specify it correctly, and what to check before your shipment leaves the factory.
Which Marking Method Gives Me the Most Durable Result for Industrial or Outdoor Use?
Every project has a marking failure story. Ink peels. Labels fade. A serial number becomes unreadable after six months in a wet environment. We have seen these failures across hundreds of shipments, and the cause is almost always the same: the wrong method was chosen for the operating environment.
Laser marking is the most durable option for industrial and outdoor applications. It changes the metal surface at a molecular level — no ink, no adhesive, no coating that can peel or fade. The mark survives chemical exposure, abrasion, UV radiation, and elevated temperatures that would destroy any ink-based method within months.

Why Ink-Based Marks Fail Outdoors
Screen printing and pad printing both deposit ink on top of a surface. The ink bonds to the substrate through a combination of mechanical adhesion and chemical crosslinking. That bond is real — but it has limits.
UV radiation degrades the binder in most ink systems within one to three years of outdoor exposure. Thermal cycling — the daily expansion and contraction of metal in a changing climate — creates micro-stress at the ink-metal interface. Over time, the ink lifts at the edges and moisture works underneath.
Chemical resistance is another weak point. Cleaning agents, lubricants, cutting fluids, and industrial solvents attack ink adhesion. A part that lives inside a machine enclosure and gets wiped down weekly with isopropyl alcohol will lose its ink-based markings within a year under normal cleaning schedules. Research into UV inks on metal 1 confirms that even chemically crosslinked solvent-borne formulations show limited outdoor durability compared to substrate-integrated alternatives.
How Laser Marking Works and Why It Holds
A fiber laser marking machine 2 focuses a high-energy beam on a precise spot on the metal surface. The interaction is thermal and metallurgical — the laser either oxidizes the surface (laser annealing, 3 common on stainless steel), ablates a thin layer to create a contrasting recess (laser engraving and ablation), 4 or disrupts the crystal structure to produce a color shift.
The result is a mark that is part of the substrate, not sitting on top of it. There is no ink layer to delaminate. There is no edge to lift.
Durability Comparison by Method
| Criteria | Screen Printing | Pad Printing | Laser Marking |
|---|---|---|---|
| UV resistance | Low–Medium | Low–Medium | Excellent |
| Chemical resistance | Medium | Low–Medium | Excellent |
| Abrasion resistance | Medium | Low | Excellent |
| Temperature resistance | Up to ~120°C | Up to ~100°C | No practical limit |
| Adhesion failure risk | Yes | Yes | No (no adhesion) |
| Outdoor service life | 1–3 years | 1–2 years | Product lifetime |
One Important Limitation of Laser Marking
Laser marking on steel and aluminum produces only monochromatic output — blacks, grays, and on stainless steel, annealed gold or blue tones from the oxide layer. You cannot reproduce a Pantone color with a laser. If your marking spec requires an exact brand color — a red safety warning, a green indicator legend, a blue corporate logo — you need screen or pad printing, or a combination approach where laser marks traceability data and ink marks color-critical graphics.
Thin Sheet Metal Requires Depth Control
Aggressive laser engraving settings on parts thinner than 1 mm can reduce local wall thickness and introduce stress concentrations or micro-cracks. For thin-gauge parts, specify maximum engraving depth in your drawing callout and require the supplier to validate settings on scrap coupons before running production parts.
How Do I Specify Marking Position, Size, and Content Clearly on My Drawing?
Vague marking specs are one of the most consistent sources of supplier-driven variation we see. "Print logo here" with an arrow is not a specification. It is an invitation for the supplier to make decisions you did not approve.
To specify marking correctly, your drawing must include the exact position (X/Y coordinates from a datum), the bounding box dimensions, the content (vector file or exact text string), the method, the color or finish tone, and the applicable standard or acceptance criterion. Incomplete specs result in the supplier improvising — and you discovering the variation at incoming inspection.

What a Complete Marking Callout Includes
Every marking specification on a technical drawing should contain the following elements:
1. Method: State explicitly — "Laser mark," "Screen print," or "Pad print." Do not leave the supplier to choose.
2. Content: For text, provide the exact character string including font name, weight, and size in mm. For logos or icons, reference a vector file (DXF, SVG, or AI) by drawing revision number, and store it in your document control system so the supplier receives it with the drawing package.
3. Position: Use a coordinate callout referenced to an existing datum on the part — for example, "Center of marking zone: 45 mm from datum A, 12 mm from datum B." Arrows alone are not repeatable.
4. Bounding box: State the overall marking area dimensions — "Marking zone: 80 mm × 20 mm maximum."
5. Color or finish tone: For ink-based methods, specify the Pantone number and ink system (UV-cure, solvent-borne, or two-part epoxy). For laser marking, specify the surface treatment — annealed black, ablated contrast, or engraved depth target.
6. Acceptance criteria: Reference a golden sample or define the minimum contrast ratio, edge sharpness, and permissible positional deviation. A callout such as "Position tolerance: ±0.5 mm from nominal" is measurable and inspectable.
Tooling Documentation and Version Control
Pad printing clichés and screen printing stencils are physical tooling that embodies your approved artwork. Treat them as you would a mold or fixture:
| Item | Requirement |
|---|---|
| Ownership | State in PO or contract that tooling is buyer's property |
| Storage | Stored with the approved golden sample at the supplier's facility |
| Version control | Tied to your ECN (Engineering Change Notice) workflow |
| Change authorization | Supplier cannot re-screen or re-engrave without written buyer approval |
| Inspection at first use | First-article marking sample required before production run |
If artwork changes — a regulatory update, a logo refresh, a new part number — the supplier must destroy the old stencil or cliché and produce a new one against your updated vector file. Without a formal change control process, suppliers sometimes re-screen from a worn stencil or a low-resolution scan without notifying you.
Pad printing 5 clichés in particular are susceptible to wear at fine detail edges, and a supplier running from a degraded cliché will produce progressively softer marks without realizing the artwork has drifted from your approved sample.
Laser Marking Artwork Files
For laser marking, the artwork is a machine file loaded directly into the laser controller. Require the supplier to store the original file in a named, revision-controlled folder and to send you a copy. Confirm the file version before each production run by checking the revision number against your drawing package. This prevents silent artwork drift between orders.
Common Specification Errors to Avoid
- Specifying position with a single arrow and no dimensional reference
- Providing artwork only as a raster JPEG or low-resolution PNG
- Omitting the marking method and letting the supplier select
- Failing to specify post-coat vs. pre-coat sequence for ink-based marking
What Is the Cost Difference Between Laser Marking and Ink-Based Printing on Sheet Metal?
Buyers often assume laser marking is the expensive premium option. In practice, the cost comparison is more nuanced — and at production volume with variable data, laser marking is frequently cheaper per part than ink-based alternatives.
Laser marking has near-zero consumable cost per part and no tooling cost — the setup is a software file. Screen and pad printing require physical stencils or clichés (tooling cost per artwork), ink consumables, and a separate production step. For high-volume repeat orders with fixed artwork, ink-based unit costs can be lower. For variable or serialized data, laser marking is always cheaper.

Cost Structure Breakdown
Understanding the cost drivers for each method helps you make the right sourcing decision for your volume and data requirements.
Laser Marking Cost Structure
The primary cost is machine time. A fiber laser marker is a capital asset owned by the fabricator — you are paying for time on that machine, typically calculated as a per-piece or per-batch rate. There are no consumables (no ink, no solvent, no stencil). The setup file is a software asset reused across every production run at no additional cost.
For serialized parts — unique serial numbers, QR codes, data matrix codes for lot traceability — the laser simply loads the next number in a sequence. No tooling change. No added cost per unique mark. This is why laser marking is the only cost-effective route for variable data at production scale.
Screen Printing Cost Structure
Screen printing involves a one-time tooling cost to produce the mesh stencil — typically $50–$200 USD per color per artwork, depending on complexity and the supplier's location. Unit printing costs are low at volume once the stencil is made. However, any artwork change — even a minor text revision — requires a new stencil at full tooling cost.
Pad Printing Cost Structure
The pad printing 6 process uses engraved metal or polymer clichés that cost less to produce than screen stencils — typically $30–$120 USD per artwork. Unit costs are similarly low at volume. Setup time per run is higher than laser marking because the silicone pad, ink cup, and cliché alignment all require physical adjustment.
Cost Comparison Table
| Cost Factor | Screen Printing | Pad Printing | Laser Marking |
|---|---|---|---|
| Tooling cost (per artwork) | $50–$200 | $30–$120 | $0 |
| Consumable cost per part | Low (ink) | Low (ink) | Near zero |
| Setup time per run | Medium | Medium–High | Low |
| Variable/serialized data cost | High (new stencil per mark) | High (new cliché per mark) | No added cost |
| Minimum order qty for cost efficiency | Medium–High | Medium | Low |
| Artwork change cost | Full retooling | Full retooling | Software edit only |
Outsourcing Risk and Hidden Costs
Most Chinese sheet metal fabricators own fiber laser marking equipment as standard shop floor tooling. Very few operate in-house screen printing or pad printing lines. When you specify ink-based marking, your parts are typically sent to a subcontractor — a separate facility with its own quality controls, lead time, and communication chain.
This outsourcing introduces a quality handoff that your supplier agreement must explicitly address. Defects that arise at the subcontractor — misregistered prints, wrong ink color, incomplete curing — can be difficult to attribute and slow to resolve. Factor this accountability gap into your total cost calculation, not just the unit price.
How Can I Inspect Marking Quality and Permanence Before My Parts Are Shipped?
Pre-shipment inspection is the last point where you control quality before it becomes your problem. Marking defects that are easy to reject at the factory become expensive to deal with after your container arrives.
To inspect marking quality before shipment, evaluate visual conformance against a golden sample, check positional accuracy with dimensional measurement, and run a field adhesion test for ink-based methods. For laser marks, verify legibility and contrast under standardized lighting. For regulated markets, confirm the marking content matches your compliance requirements.

Visual Inspection: What to Check
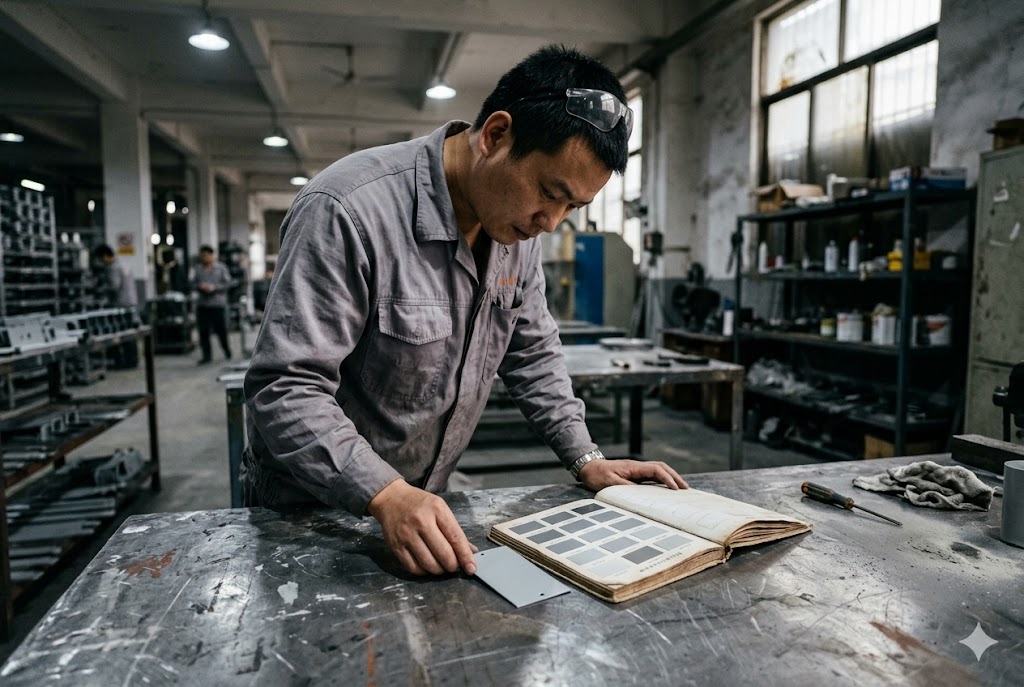
Start with a golden sample — a production-approved reference part with marking you have physically signed off. Every inspection should compare current production parts against that sample under consistent lighting conditions.
Check these parameters for every batch:
- Content accuracy: Every character, symbol, and graphic element matches the approved artwork exactly. No transposed digits, missing characters, or incorrect fonts.
- Color: For ink-based marking, compare under D65 (daylight-equivalent) illumination against the approved Pantone chip. Metamerism — color that matches under one light source and shifts under another — is a common problem with ink-based methods.
- Registration: Positional deviation from nominal, measured against the drawing callout. Use a digital caliper or optical comparator to verify coordinate accuracy.
- Edge quality: Clean, sharp edges on laser marks. For screen and pad printing, no bleeding, feathering, or satellite ink spots.
- Coverage: No voids, pinholes, or unprinted areas in ink fill zones.
Adhesion Testing for Ink-Based Marking
Visual inspection alone does not verify ink bond integrity. Run a cross-cut adhesion test per ASTM D3359 7 on sample parts:
- Use a cross-cut tool to cut a 6×6 grid of 1 mm squares through the ink layer to the substrate.
- Apply a standardized pressure-sensitive tape (3M 250 or equivalent) over the grid.
- Pull the tape at 180° in one sharp motion.
- Evaluate ink removal against the classification scale: 0B (complete removal) to 5B (no removal).
- For industrial applications, require a minimum result of 4B (less than 5% removal).
This test should be performed on at least 3 parts per batch. If the supplier applies a topcoat over the ink (a common practice for UV protection), test after the full coating sequence is complete.
Legibility Testing for Laser-Marked Traceability Codes
For QR codes, data matrix codes, or barcodes applied by laser marking, visual clarity is not sufficient — you need to verify machine readability.
| Test | Method | Pass Criterion |
|---|---|---|
| Symbol grade verification | ISO/IEC 15415 8 or 15416 grader | Grade C or higher for production use |
| 1D barcode scan | Handheld scanner, multiple angles | Reads correctly in ≤3 scan attempts |
| 2D code scan | Smartphone or industrial scanner | Reads correctly on first attempt |
| Contrast check | Reflectance measurement | Minimum 70% print contrast signal |
If your parts are destined for regulated markets requiring UL, CE, or RoHS substance restrictions 9 compliance, laser marking eliminates the ink chemistry compliance burden entirely. There is no ink formulation to validate against hazardous substance thresholds, no Certificate of Conformity required for consumables, and no risk of a supplier substituting an ink system between production runs without your knowledge.
Third-Party Inspection
For high-value orders or new suppliers, use a third-party inspection agency — SGS, Bureau Veritas, or equivalent — to conduct pre-shipment inspection against your marking specification. The laser annealing process 10 used on stainless steel parts produces a black oxide mark that third-party inspectors can verify against your contrast and depth specifications without specialized equipment. Provide the inspector with a copy of your golden sample, the drawing callout, the adhesion test requirement, and the code grade requirement. A written inspection report before the container is sealed gives you documented evidence and negotiating leverage if defects are found.
Conclusion
Choose your marking method based on geometry, durability, color requirements, and data type — not cost alone. Specify it completely on your drawing, control the tooling, and inspect against a golden sample before your parts ship.
Footnotes
1. Overview of UV and solvent ink performance on metal surfaces for outdoor applications. ↩︎
2. How fiber laser systems mark metal surfaces with codes, text, and logos permanently. ↩︎
3. TRUMPF explains laser annealing: marking steel without removing material or damaging surfaces. ↩︎
4. Laserax explains industrial laser ablation mechanics and how marks are formed on metal. ↩︎
5. Fictiv guide to pad printing: process, applications, and comparison with other methods. ↩︎
6. Wikipedia overview of pad printing history, cliché tooling, and silicone pad ink transfer. ↩︎
7. ATS Lab explains ASTM D3359 cross-cut and X-cut adhesion test methods for coatings. ↩︎
8. ANSI Blog overview of ISO/IEC 15415:2024 quality grading standard for 2D barcode symbols. ↩︎
9. NIST FAQ covering RoHS directive scope, restricted substances, and compliance requirements. ↩︎
10. Keyence explains laser annealing on stainless steel: process, mark quality, and inspection. ↩︎