Skip to main content Skip to footer
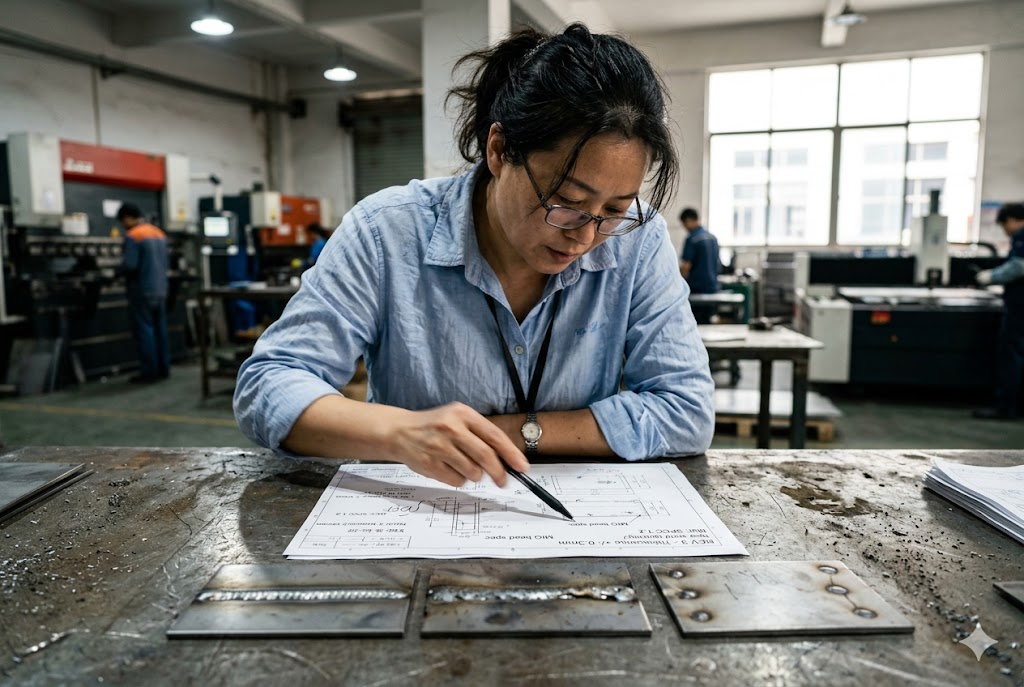
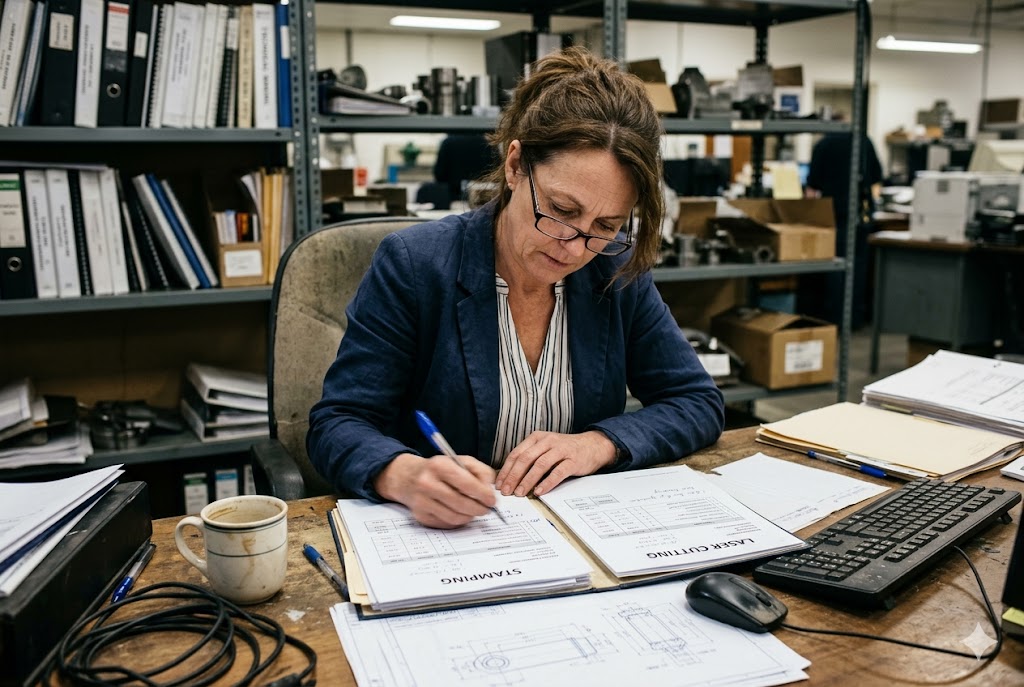
Every time our team reviews a new sheet metal drawing from a client, the welding callout is one of the first things we check. A wrong process choice — or no callout at all — leads to rework, delays, and inspection disputes that nobody wants.
Your welding process choice directly controls joint strength, heat distortion, surface appearance, and downstream finishing cost. TIG produces the cleanest cosmetic welds on thin and precision parts. MIG suits structural, high-volume seams. Spot welding works for lap joints on thin sheet where localized connection points are enough.
The right answer depends on your material, tolerance, finish class, and volume. Let's break it down section by section so you can specify confidently before production starts.
When Should I Ask for TIG, MIG, or Spot Welding for My Project?
When clients send us RFQs without a welding process specified, we always flag it before quoting. The process you choose changes cost, lead time, and quality outcomes — sometimes dramatically.
TIG welding is the right choice when appearance and precision matter most. MIG welding suits structural seams where speed and volume are priorities. Spot welding is correct for thin-sheet lap joints where you need fast, localized connection points without a continuous seam.

TIG Welding: Precision and Appearance First
TIG (Gas Tungsten Arc Welding, or GTAW) 1 gives the welder the most control of any arc process. Heat input is lower. The arc is narrower. Filler is added separately by hand, which means the welder can adjust in real time.
This makes TIG the standard for:
- Stainless steel and aluminum cosmetic parts
- Thin sheet (under 3 mm) where burn-through is a risk
- Joints that will be visible after finishing
- Parts that require tight dimensional tolerances after welding
The trade-off is speed. TIG is slower than MIG and costs more per weld-hour. For high-volume structural work, that cost adds up fast.
MIG Welding: Speed and Structural Strength
MIG (Gas Metal Arc Welding, or GMAW) 2 feeds wire automatically and deposits filler faster than TIG. It is the default process for structural fabrication in most Chinese sheet metal shops.
MIG produces a wider bead with more spatter. Heat input is higher. This increases the risk of distortion on thin material. But for parts where appearance is secondary and volume is high, MIG is the practical choice.
| Process | Best For | Appearance | Heat Input | Relative Cost |
|---|---|---|---|---|
| TIG (GTAW) | Cosmetic, thin, precision | Excellent | Low | High |
| MIG (GMAW) | Structural, high volume | Acceptable | Medium–High | Medium |
| Spot Welding | Thin lap joints, sheet panels | Functional only | Very localized | Low |
| Laser Welding | Precision, narrow HAZ | Excellent | Very Low | Very High |
Spot Welding: High Speed for Lap Joints
Spot welding 3 uses copper electrodes to pass current through overlapping sheets at a specific point. The localized heat creates a weld nugget at the contact zone. No filler is used.
It is fast, repeatable, and cost-effective for thin sheet assemblies. But it leaves a visible electrode contact mark and a slight surface indentation. This rules it out for any Class A cosmetic surface.
Spot welding is correct when:
- You are joining thin sheet (typically under 3 mm per layer)
- The joint is a lap joint
- The connection point does not need to form a continuous, sealed seam
- The surface is not visible in the final product
What About Laser Welding?
Laser welding 4 delivers the narrowest heat-affected zone of any process. Distortion is minimal. Appearance is excellent. But it requires very precise joint fit-up — any gap causes failure — and the per-hour cost is substantially higher than TIG or MIG. It is worth specifying for high-value, tight-tolerance cosmetic assemblies where TIG still introduces too much heat.
How Can I Reduce Weld Marks and Distortion on Visible Sheet Metal Parts?
Our engineers have found that distortion and cosmetic weld issues are almost never caused by poor welding skill alone. They are caused by poor planning — the wrong process, wrong joint design, or no distortion control specified in the drawing before production starts.
Weld distortion and surface marks on visible sheet metal parts are reduced by choosing TIG over MIG, using stitch welding instead of continuous beads on long seams, specifying copper or aluminum backing bars to act as heat sinks, and classifying your weld appearance requirements before production begins.

Understanding the Heat-Affected Zone (HAZ)
The heat-affected zone 5 is the base metal area surrounding the weld that gets hot enough to change metallurgically — but not hot enough to melt. This matters for two reasons.
First, differential heating and cooling creates residual stress. The metal expands when hot and contracts when it cools. The HAZ contracts at a different rate than the surrounding cold metal. This differential is what causes warping, bowing, and pulling along the weld line.
Second, the microstructure changes. In stainless steel, rapid heating in the HAZ can cause chromium carbide precipitation (sensitization) 6, which reduces corrosion resistance near the weld. In aluminum, it softens the heat-treated temper. These are not cosmetic problems — they are strength and service life problems.
Stitch Welding: The Standard for Long Seams on Thin Sheet
A continuous weld bead deposits heat uniformly along the entire seam length. For structural, thick-plate work, this is fine. For thin sheet, it is often the primary cause of distortion.
Stitch welding — using intermittent weld segments with gaps between them — dramatically reduces heat input per unit length. It provides adequate structural strength while giving the metal time to cool between passes.
| Weld Type | Heat Input | Distortion Risk | Finishing Labor | Filler Consumption |
|---|---|---|---|---|
| Continuous bead | High | High | High | High |
| Stitch (intermittent) | Low–Medium | Low | Low | Low |
| Tack welds only | Very Low | Very Low | Minimal | Minimal |
Backing Bars: A Simple, Effective Heat Sink
For cosmetic TIG welds on stainless steel or aluminum, copper or aluminum backing bars placed behind the joint are a proven distortion control method. Copper has very high thermal conductivity — it pulls heat away from the weld zone rapidly before it soaks into the base material.
The result is a narrower HAZ, less discoloration (especially on stainless), and near-zero distortion on thin gauges. If your drawing does not specify backing bars, most fabricators will not use them. Add it to your process notes explicitly.
Weld Class: Define Appearance Standards Before Production
Many clients do not know that weld appearance can and should be formally classified on drawings. Without a defined class, fabricators will apply their own internal standard — which may not match your expectations.
A basic weld class system works like this:
| Class | Surface Type | Appearance Requirement | Typical Post-Weld Work |
|---|---|---|---|
| Class A | Visible, consumer/medical/architectural | Uniform, smooth, spatter-free, no grinding marks visible | Minimal; TIG direct to finish |
| Class B | Semi-visible | Minor grinding acceptable, no pits or undercut | Light grinding and blending |
| Class C | Non-visible, structural | Integrity only, no cosmetic requirement | None required |
Specifying the weld class on your drawing before you issue it for quoting aligns appearance expectations with manufacturability and cost. Doing it after the fact — during inspection — turns into a commercial dispute.
Joint Design Also Controls Distortion
Butt joints are preferred for flush, cosmetic surfaces. But they are sensitive to fit-up gaps. Any gap increases heat input and distortion. For thin sheet butt joints, a backing flange or backing bar behind the joint makes the weld reliably producible in volume production.
Lap joints are more forgiving on fit-up and suit spot welding and intermittent MIG seams. But they introduce double thickness at the joint, which traps heat under continuous welding and increases distortion risk.
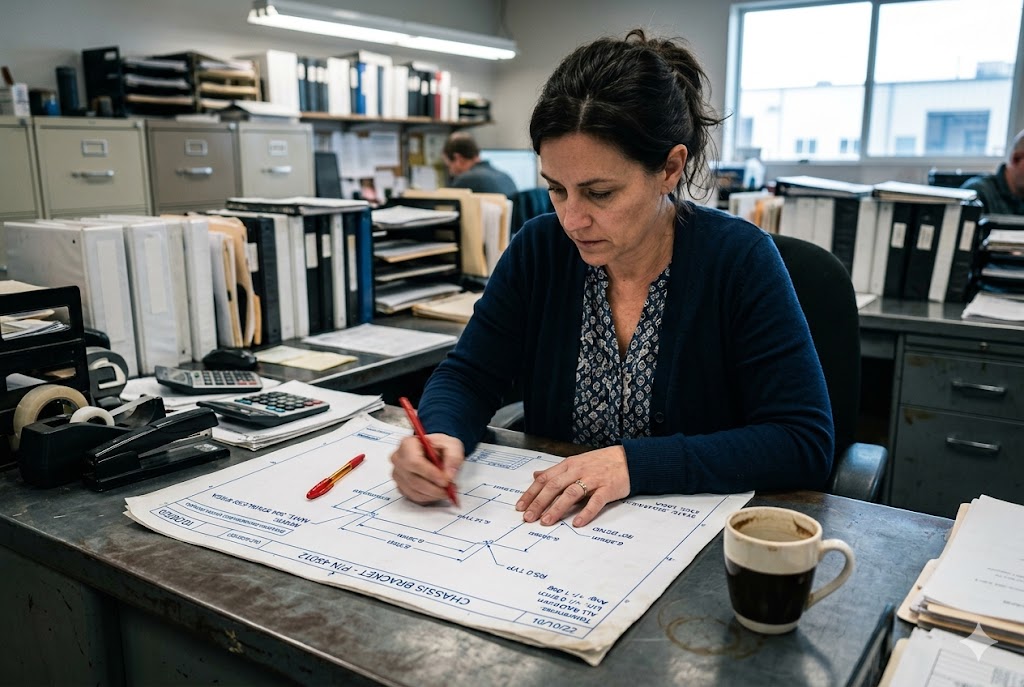
What Welding Details Should I Define Before Approving a Production Sample?
When our team places orders with fabricators on behalf of clients, we always push to lock down welding details at the sample stage — not the mass production stage. Changes after sample approval cost real money and time.
Before approving a production sample, you should define the welding process, filler material, weld symbol per AWS A2.4 or ISO 2553, weld class, post-weld treatment requirements, and whether grinding and blending is included on each joint. Without these, fabricators default to the fastest available process.

What Your Drawing Must Specify
This is the minimum required welding information on any drawing issued to a Chinese fabricator for a cosmetic or precision sheet metal part:
| Drawing Requirement | Why It Matters |
|---|---|
| Weld process (TIG, MIG, spot) | Without this, fabricators default to MIG or spot for speed |
| Filler material and grade | Controls strength, corrosion resistance, and color match |
| Weld symbol (AWS A2.4 7 or ISO 2553 8) | Communicates joint type, size, length, and position without ambiguity |
| Weld class (A, B, or C) | Sets the cosmetic acceptance standard |
| Post-weld grinding / blending required? | Fabricators treat grinding as an optional extra unless specified |
| Post-weld stress relief required? | Critical if the part will be machined after welding or carries cyclic loads |
| Backing bar required? | Specifies the distortion control method for thin butt joints |
Why Chinese Fabricators Default to the Fastest Process
This is not a criticism — it is a business reality. Fabrication shops in China operate on thin margins and high volume. Without explicit instructions, the estimator quotes the fastest process. The floor team executes to what was quoted. If your drawing is silent on process, you will almost always receive a MIG or spot-welded part regardless of what you expected.
When our project managers place orders, we translate client drawings into process-level instructions that the fabricator's floor team can execute without ambiguity. That step alone eliminates most of the welding-related quality issues we have seen in eight years of sourcing sheet metal assemblies.
Stress Relief: Mandatory for Certain Applications
Post-weld stress relief 9 — typically thermal annealing at a specified temperature and time — is necessary, not optional, in three situations:
- The welded assembly will be machined after welding. Residual stress releases during machining and causes warping. The part moves off dimension as you cut it.
- The part must hold tight dimensional tolerances in service under temperature cycling.
- The assembly carries cyclic loads where residual tensile stress in the HAZ reduces fatigue life.
If any of these apply to your part, specify stress relief on the drawing. Include temperature, hold time, and cooling rate if you have a material-specific requirement.
Downstream Finishing Sequence Depends on Your Process Choice
Your welding process directly determines what finishing steps follow — and what they cost.
MIG welds on visible surfaces require grinding, blending, and often filling before powder coat or paint will adhere and look acceptable. TIG welds on stainless can often proceed directly to passivation or brushing without grinding. Spot welds leave a surface indentation that is incompatible with Class A finishes.
If your drawing specifies a Class A cosmetic finish but the weld callout allows MIG, you have a conflict that the fabricator cannot resolve without either grinding (adding cost) or delivering a substandard result. Map your process against your finish specification before issuing the drawing.
How Do I Inspect Whether the Weld Quality Meets My Drawing and Cosmetic Standards?
Our quality team runs pre-shipment inspections on welded sheet metal assemblies every week. The most common finding is not catastrophic failure — it is a mismatch between what the drawing implied and what the fabricator understood. Good inspection starts with a clear acceptance standard, not a subjective walk-around.
Weld quality inspection combines visual checks against a defined weld class standard, dimensional verification of the assembly after welding, and where required, non-destructive testing such as dye penetrant or radiographic inspection for structural-critical joints.

Visual Inspection Checklist
Visual inspection is the first and most cost-effective layer. It catches the majority of surface defects without any special equipment. Use this checklist systematically — not as a walk-around impression.
| Defect | What to Look For | Acceptable for Class A? | Acceptable for Class C? |
|---|---|---|---|
| Spatter | Metal droplets on or near the weld | No | Minor acceptable |
| Undercut | Groove along the weld toe into base metal | No | No |
| Porosity | Surface pits or holes in the bead | No | No |
| Cracking | Any visible crack in weld or HAZ | No | No |
| Incomplete fusion | Visible gap or cold lap at weld edge | No | No |
| Excessive reinforcement | Weld bead significantly proud of surface | No | Minor acceptable |
| Grinding marks | Visible scratch lines from post-weld grinding | No | Acceptable |
| Discoloration (stainless) | Heat tint beyond agreed tolerance zone | No | Acceptable |
Dimensional Inspection After Welding
Welding changes dimensions. Shrinkage and distortion move the assembly. For precision parts, check the following after welding and before any machining:
- Overall envelope dimensions (length, width, height)
- Flatness of any welded panel or plate
- Hole-to-hole distances across welded joints
- Squareness and angularity of welded flanges or brackets
Use a coordinate measuring machine (CMM) for tight tolerance assemblies, or a surface plate and height gauge for simpler checks. If the part will be machined after welding, inspect dimensions before machining to confirm the stock is still in the right location.
Non-Destructive Testing (NDT) for Structural Joints
For joints that carry structural load, visual inspection alone is not sufficient. Common NDT methods for sheet metal welded joints:
Dye Penetrant (PT) 10: Low cost, no equipment beyond chemicals and UV light. Reveals surface-breaking cracks and porosity. Suitable for stainless steel and aluminum. Does not detect subsurface defects.
Magnetic Particle (MT): For ferromagnetic materials (carbon steel). Detects surface and near-surface discontinuities. Not applicable to stainless steel or aluminum.
Radiographic (RT): X-ray or gamma-ray imaging. Detects internal porosity, inclusions, and lack-of-fusion defects. Higher cost but provides a permanent record. Required for pressure-bearing or safety-critical joints in many industries.
Specify which NDT method is required on your drawing if it applies. Without this specification, no NDT will be performed.
What Counts as a Rejected Part?
Define acceptance and rejection criteria in writing before production starts. This protects both sides. Without written criteria, every inspection becomes a negotiation. With written criteria, the inspector checks against the standard and the result is unambiguous.
Your acceptance criteria document should reference the weld class, list the defect types that result in automatic rejection, state the sampling plan (100% inspection or AQL-based sampling), and specify what happens to rejected parts — rework, scrap, or concession request.
Conclusion
Choose your welding process before your drawing is issued. Define your weld class, finish requirements, and inspection criteria in writing. A clear drawing prevents almost every welding quality dispute we have seen in the field.
Footnotes
1. Baker's Gas & Welding: comprehensive introduction to TIG (GTAW) process, materials, and filler selection. ↩︎
2. Wikipedia overview of Gas Metal Arc Welding (GMAW/MIG), transfer modes, and process variables. ↩︎
3. TWI: what resistance spot welding is, how it works, and where it is applied. ↩︎
4. ESAB: how laser welding compares to arc welding on HAZ, distortion, and precision. ↩︎
5. TWI: definition of the heat-affected zone and why it matters for weld integrity. ↩︎
6. Corrosionpedia: explanation of sensitization — chromium carbide precipitation and its effect on stainless corrosion resistance. ↩︎
7. ANSI Blog: summary of AWS A2.4:2020 changes to standard welding and brazing symbols. ↩︎
8. ISO news release: overview of ISO 2553, the international standard for welding symbols on technical drawings. ↩︎
9. Radyne Corporation: how post-weld stress relief works, including temperature, hold time, and cooling rate guidance. ↩︎
10. NDT Group: beginner's guide to dye penetrant inspection — method, advantages, and weld defect detection scope. ↩︎