Skip to main content Skip to footer
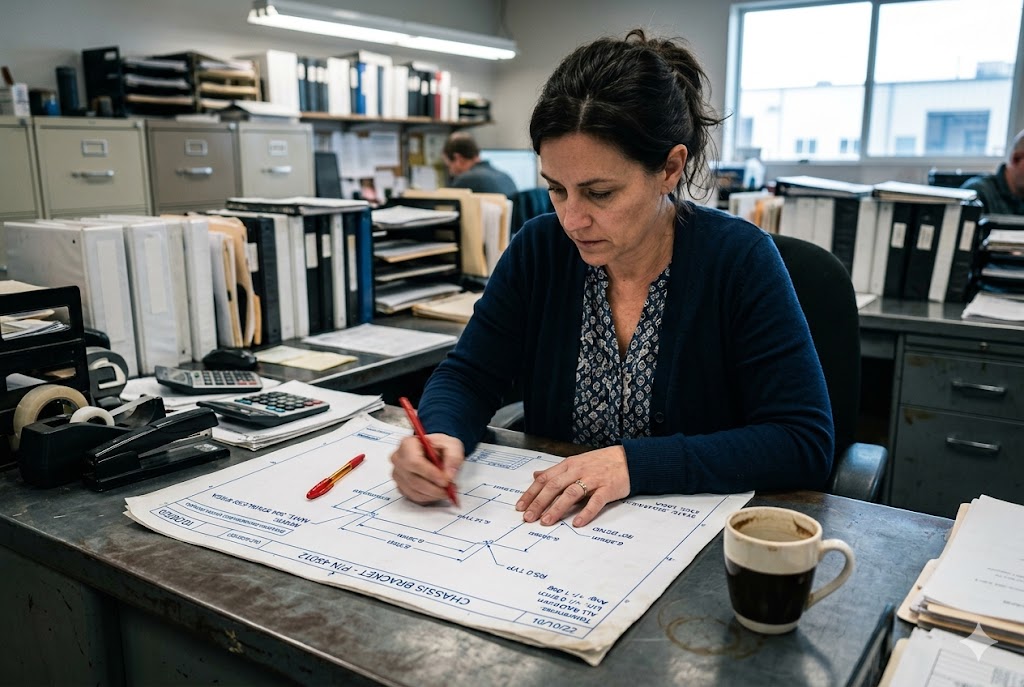
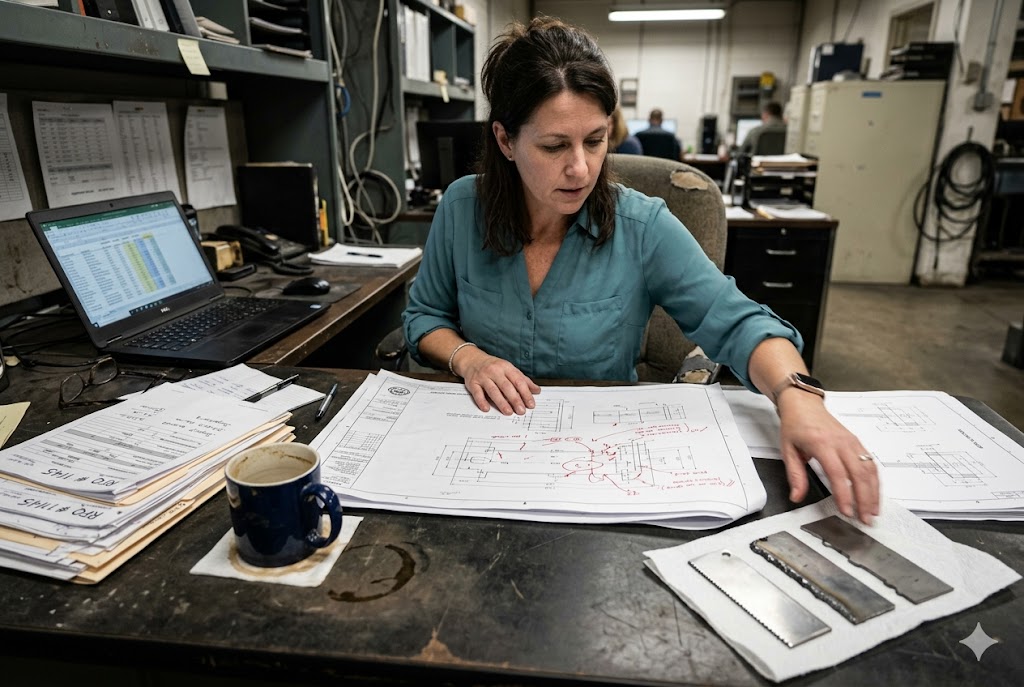
We see this mistake every week: a buyer sends us a sheet metal drawing with no bend radius callout, the factory picks a random punch, and the part comes back wrong.
The minimum bend radius for sheet metal depends on material type and thickness. For mild steel under 3 mm, use 0.8–1× thickness. For stainless steel, use 1.5–2×. For 6061-T6 aluminum, use 1–1.5×. Always call out the inside radius explicitly on your drawing, or your supplier will decide for you.
If you want parts that come back correct on the first run, you need to control every bend on your drawing. Here is how to do it.
How Can I Avoid Bending Cracks or Deformation in My Sheet Metal Design?
Cracked bends and warped flanges are two of the most common defects we see on incoming parts from new suppliers. Both are preventable at the design stage.
To avoid bending cracks, never go below the minimum inside bend radius for your material and thickness. For stainless steel 3–6 mm thick, that minimum is 1.5–2× thickness. For high-strength steels like DP780, it can reach 5–8× thickness. Grain direction and springback also affect the result — both must be accounted for before you finalize the flat pattern.

Why Minimum Bend Radius Matters More Than People Think
Most buyers think bend radius is a small detail. It is not. Go below the minimum and you put the outer fiber of the material under tensile stress it cannot absorb. The result is a crack at the bend line, a thinned wall, or a split flange. These defects often look fine visually but fail in service.
The minimum radius is not a fixed number. It scales with both material type and thickness. In bending (metalworking) 1, the outer fiber of the sheet must sustain tensile strain without fracturing — the tighter the radius, the higher the local strain. Here is a practical reference table:
| Material | Thickness Range | Minimum Inside Bend Radius |
|---|---|---|
| Mild Steel (A36 / 1018) | < 3 mm | 0.8–1× thickness |
| Mild Steel (A36 / 1018) | 3–6 mm | 1–1.5× thickness |
| Mild Steel (A36 / 1018) | 6–12 mm | 1.5–2× thickness |
| 304 / 316 Stainless Steel | < 3 mm | 1.5–2× thickness |
| 304 / 316 Stainless Steel | 3–6 mm | 2–2.5× thickness |
| 304 / 316 Stainless Steel | 6–12 mm | up to 3× thickness |
| 6061-T6 Aluminum | < 3 mm | 1–1.5× thickness |
| 6061-T6 Aluminum | 3–6 mm | 1.5–2× thickness |
| 6061-T6 Aluminum | 6–12 mm | 2–3× thickness |
| DP780 / DP1180 (AHSS) | any | 3–8× thickness |
Do not apply thin-gauge rules to thick plate. That is the single most common design error we review. A radius that works fine for 1.5 mm stainless will crack 6 mm stainless on the first hit.
Grain Direction: The Variable Most Buyers Ignore
Sheet metal is rolled in one direction. That rolling creates a grain. If you bend parallel to the grain, tensile stress runs perpendicular to it — that is the weaker axis, and cracks are more likely.
The practical rule: if a critical bend axis runs parallel to the grain direction, add 50% to your minimum bend radius. Better still, redesign the flat pattern so critical bends run perpendicular to grain. The fundamentals of how to bend metal 2 confirm that low-carbon steel and soft aluminum tolerate tighter radii precisely because their grain structures allow more plastic deformation before fracture. Mark the grain direction on your drawing if it matters for your application.
Springback: Design for the Finished Angle, Not the Tool Angle
Every bend springs back after the punch releases. The material is elastic. It recovers partially. The harder the alloy and the larger the radius, the more it springs back.
If your drawing calls for a 90° bend and you design the tooling at 90°, you will get a part that is 92° or 93° — every time. Understanding springback and springforward in press brake bending 3 is essential: when the press brake releases the workpiece, the bend angle relaxes as the material tries to return toward its original flat position. The correct approach is to:
- Design the nominal radius slightly tighter than the target finished radius.
- Specify the finished, after-springback inside radius as the inspectable dimension on your drawing.
- Let the fabricator adjust the overbend angle during setup, but hold them to the finished radius.
Chinese press brake operators are skilled at this. However, they need your drawing to tell them what the finished condition must measure — not just what angle the tool is set to.
What Bending Details Should I Include in My Drawing Before I Request a Quote?
Incomplete drawings are the number one reason quotes come back wrong or parts come back defective. Our team reviews dozens of drawings a month, and we see the same missing information repeatedly.
Before you request a quote, your sheet metal drawing must include: explicit inside bend radius callouts on every bend, the K-factor or bend allowance used for flat pattern development, a bend table listing each bend ID with angle, radius, and tolerance, and a general note governing unspecified bend radii. Missing any one of these gives your supplier room to make decisions you did not approve.

Inside Radius vs. Outside Radius: Call It Out Correctly
Every radius value on a sheet metal drawing should be the inside radius — the concave face of the bend. That is the convention press brake operators and tooling libraries use worldwide, including in China.
If your drawing specifies an outside radius or a centerline radius, say so explicitly. Do not assume the reader will infer it. Misreading the radius convention is one of the most common root causes of mis-bent parts we see in first article inspection.
The Bend Table: Your Single Most Useful Drawing Addition
For any part with more than two bends, add a bend table. This is a simple tabulation, either in the title block or as a separate note block, that lists:
| Bend ID | Nominal Angle | Inside Radius | Tolerance |
|---|---|---|---|
| B1 | 90° | R1.0 mm | ±0.5° / ±0.2 mm |
| B2 | 45° | R1.5 mm | ±0.5° / ±0.2 mm |
| B3 | 90° | R1.0 mm | ±0.5° / ±0.2 mm |
Chinese fabricators working at volume program press brakes 4 directly from this table. It eliminates transcription errors from reading individual leader-line callouts across a complex flat pattern. It also gives your QC team a one-to-one checklist for first article inspection — every bend has an ID, a nominal, and a tolerance. There is nothing to interpret.
K-Factor and Bend Allowance: Specify Them or Accept the Risk
The K-factor in sheet metal metallurgy 5 governs how flat patterns are developed from bent geometry — it is the ratio of the neutral axis position to the material thickness during bending. If you calculate your flat pattern using K = 0.33 and your Chinese supplier programs their press brake software using K = 0.44, your blank dimensions will be wrong even if every individual bent leg measures correctly.
Specify K-factor in your title block notes alongside material grade and thickness. If your CAD system uses bend allowance tables instead of K-factor, export the values and include them as a note or attachment. This step takes two minutes at the drawing stage and saves hours of rework after first article. The analysis of K-factor in sheet metal bending 6 shows the range of K-factor values that can be achieved depending on tooling, material type, tensile strength, and forming method.
The General Unspecified Radius Note
Not every bend needs an individual callout. But every bend must be governed. Add a general note to your drawing:
UNSPECIFIED INSIDE BEND RADII: R1.0 ±0.2 mm
Place it in the notes field or title block. This means any bend without an individual callout defaults to that value. Without this note, your supplier is free to use whatever punch tip is loaded on the machine. In Chinese sheet metal shops, available punch radii are typically 0.5, 1.0, 1.5, 2.0, and 3.0 mm. If your drawing implies R1.2 and the nearest available tip is R1.5, that substitution will happen silently unless you have a note or clause that prohibits it.
Why Does Material Type Affect the Minimum Bend Radius of My Part?
This is one of the most frequently misunderstood questions we get from buyers sourcing for the first time. Material type is not just a mechanical property list — it determines everything about how a part behaves under a punch.
Material type affects minimum bend radius because each alloy has a different ductility, yield strength, and grain structure. Higher-strength materials have less capacity to absorb plastic deformation at the bend zone. Stainless steel, high-strength aluminum, and advanced high-strength steels all require larger minimum radii than mild steel of the same thickness — sometimes two to four times larger.

Ductility Is the Core Variable
Ductility is the material's ability to deform plastically before fracture. When you bend a sheet, the outer fiber is in tension. The inner fiber is in compression. The material must stretch on the outside without tearing.
A ductile material like annealed mild steel can sustain large strains before the outer fiber cracks. A harder material like 6061-T6 aluminum or 304 stainless has already consumed a large portion of its plastic deformation capacity during alloying or heat treatment. Less ductility means less bending before fracture — which means a larger minimum radius is required to keep the outer fiber strain within safe limits.
Material Comparison: Why the Numbers Are Different
| Material | Yield Strength (MPa) | Elongation at Break | Relative Bend Difficulty |
|---|---|---|---|
| A36 Mild Steel | 250 | 20–23% | Low |
| 304 Stainless Steel | 310 | 40–45% | Medium (higher work hardening) |
| 6061-T6 Aluminum | 276 | 8–10% | High (low ductility) |
| DP780 AHSS | 480–620 | 14–18% | Very High |
| DP1180 AHSS | 900–1100 | 5–10% | Extreme |
Note that 304 stainless has higher elongation than 6061-T6 but is still harder to bend cleanly because it work-hardens 7 rapidly. As you bend it, it gets harder at the bend zone, which increases cracking risk on tight radii. This is why stainless requires a larger radius than its elongation number alone would suggest.
Advanced High-Strength Steels: A Special Warning
DP780 and DP1180 are increasingly common in automotive and structural applications. Our engineers have found that buyers who source these materials from China without modifying their radius callouts almost always generate cracked parts on the first production run.
Research into shear fracture in bending advanced high-strength steel 8 shows that AHSS grades present new challenges during forming — fractures can occur at the outer fiber even at radii that would be safe for conventional steel of the same thickness. The strength gain in these grades comes directly at the cost of ductility. For DP1180, apply a minimum bend radius of 5–8× thickness. For DP780, 3–5× thickness. These are not conservative estimates — they reflect the actual fracture limits of the material under press brake conditions.
How Can I Check Whether My Bend Design Is Realistic for Production in China?
Designing a part that looks fine in CAD is one thing. Getting it made correctly in a Chinese sheet metal shop is another. There are specific steps you can take before you send your drawing to verify your design will survive real production.
To check whether your bend design is realistic for production in China, verify that every inside bend radius matches standard Chinese press brake tooling sizes (0.5, 1.0, 1.5, 2.0, 3.0 mm), confirm your K-factor and flat pattern are consistent with your supplier's CAM software defaults, and require a tooling radius confirmation step in your first article inspection checklist. Non-standard radii will be substituted without notice unless your drawing explicitly prohibits it.

Align Your Radii to Standard Tooling Inventory
Chinese press brake shops typically stock a discrete set of punch tip radii. The most common sizes are 0.5, 1.0, 1.5, 2.0, and 3.0 mm. If your drawing calls R1.2 mm and the nearest available tip is R1.5 mm, the operator will use R1.5. That substitution is silent. It affects your K-factor, your flat pattern accuracy, and your springback behavior — and it will not show up in a visual check.
The fix is simple: during DFM review, ask your supplier to confirm their available punch radius inventory and align your callouts to it. If R1.0 and R1.5 are both available, call R1.0 or R1.5 — do not call R1.2. This costs nothing at the design stage and eliminates a class of first-article failures.
Add a Tooling Substitution Clause
If you cannot confirm the supplier's tooling inventory before issuing the drawing, add a note:
NO TOOLING SUBSTITUTION WITHOUT WRITTEN APPROVAL. Contact engineering before substituting any punch radius.
This does not prevent substitution physically, but it creates a contractual gate. It means the supplier must communicate with you before deviating. That communication gives you the opportunity to evaluate the impact and approve or reject the change.
FAI Checklist: The Tooling Radius Confirmation Step
Our team includes a tooling radius confirmation step in every first article inspection 9 checklist for sheet metal parts. A FAI is a production validation process that verifies a new manufacturing process produces conforming parts before full production begins. Here is what the checklist looks like:
| FAI Check | Method | Accept Criterion |
|---|---|---|
| Punch tip radius used | Supplier provides punch tip ID and nominal radius | Matches drawing callout ± 0 mm |
| Inside radius measured | Radius gauge or CMM on inside of bend | Within drawing tolerance |
| K-factor / bend allowance | Supplier provides CAM setup sheet | Matches drawing-specified K-factor |
| Flat blank dimensions | CMM or manual measurement | Within ±0.3 mm or per drawing tolerance |
| Springback angle | Protractor or CMM on finished part | Finished angle within ±0.5° |
Run this checklist on the first article. If the tooling radius does not match, reject the article and require the supplier to re-setup before production. Catching this at FAI stage costs almost nothing. Catching it at 500 pieces shipped costs significantly more.
Use GD&T Profile of a Line for Critical Bends
For bends where the radius geometry is functionally critical — a sealing surface, a mating interface, or a structural load path — use a Profile of a Line callout instead of a simple R±tolerance note. Geometric dimensioning and tolerancing (GD&T) 10 is a symbolic language on engineering drawings that defines both nominal geometry and permissible variation, enabling precise communication between designers, fabricators, and quality inspectors. Profile of a Line defines an acceptable band around the theoretically perfect arc. It is the correct way to control a bent radius because real bent radii are never perfectly geometric — they are slight approximations of an arc. A tolerance band is more honest and more measurable than demanding a perfect arc within ±0.1 mm.
For non-critical bends, a simple R[value]+/-[tolerance] leader line pointing to the inside of the bend is sufficient and easier for Chinese fabricators to interpret cleanly.
Conclusion
Getting sheet metal bends right starts at the drawing stage. Call out inside radii explicitly, specify your K-factor, add a bend table, and align your radii to standard tooling. Do that, and your supplier has no room to guess.
Footnotes
1. Wikipedia overview of sheet metal bending mechanics, including bend radius and outer-fiber strain. ↩︎
2. The Fabricator guide to how material ductility and grain direction determine minimum bend radius. ↩︎
3. The Fabricator explains springback physics, overbend compensation, and how material properties affect angle recovery. ↩︎
4. Wikipedia article on press brake machines, tooling types, and standard operating parameters. ↩︎
5. Wikipedia explanation of K-factor in sheet metal: its definition, formula, and role in flat pattern accuracy. ↩︎
6. The Fabricator deep-dive into K-factor variables including material type, forming method, and neutral axis shift. ↩︎
7. Wikipedia on work hardening: how plastic deformation increases material strength and reduces local ductility during bending. ↩︎
8. The Fabricator R&D article on shear fracture risks specific to advanced high-strength steel (AHSS) during press brake forming. ↩︎
9. Wikipedia definition and process overview of First Article Inspection, including dimensional and tooling verification requirements. ↩︎
10. Wikipedia introduction to GD&T: symbolic tolerancing system for defining nominal geometry and permissible variation on engineering drawings. ↩︎