Skip to main content Skip to footer
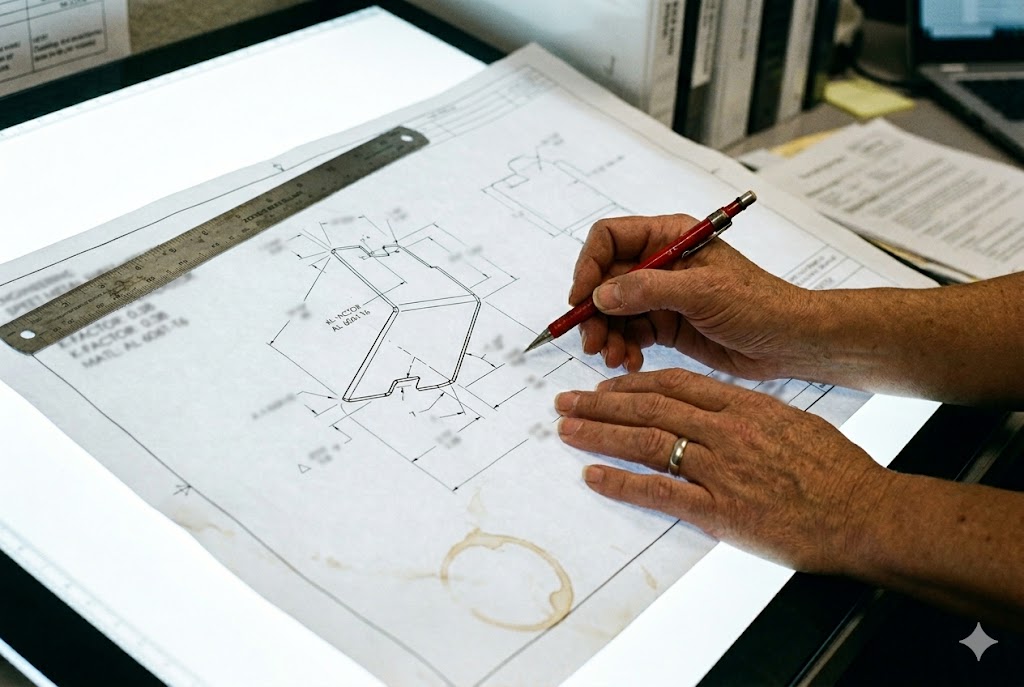
Every week, our team reviews drawings from buyers who have already paid for a failed first article. The part looked fine on screen. The callouts seemed complete. Yet the threaded holes stripped, the inserts pressed in backwards, and the countersinks came out at the wrong angle. These are not manufacturing failures. They are drawing failures.
To specify tapping, PEM inserts, and countersunk holes correctly on a sheet metal drawing, you must include the full thread callout with pitch and tolerance class for tapped holes, the complete manufacturer part number and installation side for PEM inserts, and both the major diameter and included angle for countersinks. Missing any one of these details gives your fabricator room to guess — and they will guess wrong.
Get these three feature types right on paper, and most downstream assembly problems disappear before the first chip is cut. Here is exactly how to do it.
What Hole and Hardware Details Should You Define Before You Request a Quote?
When our engineers review an incoming RFQ package, the first thing they check is whether the drawing fully defines every threaded and inserted feature. Incomplete drawings waste everyone's time. The fabricator either stops to ask questions or — more often — makes assumptions.
Before requesting a quote for sheet metal parts with tapped holes, PEM inserts, or countersinks, you must define thread size, pitch, tolerance class, insert part number, installation side, countersink diameter, and included angle. These details determine tooling selection, process sequencing, and unit cost. Missing any one of them delays your quote and risks a non-conforming first article.

The Minimum Drawing Data Your Supplier Needs
Most buyers think a thread callout like "M6 tapped hole" is sufficient. It is not. Here is what your fabricator actually needs to select the correct tap, set the correct depth stop, and inspect the finished hole.
Tapped Hole Callout Requirements
The correct format for a metric screw thread 1 tapped hole is:
4× M6×1.0 – 6H
That callout gives the fabricator four pieces of information: quantity (4×), nominal diameter (M6), pitch (1.0 mm), and tolerance class (6H). For blind tapped holes, you must also specify drill depth and thread depth separately:
Ø5.0 ↧15.0 / M6×1.0 – 6H ↧10.0
The 5 mm of clearance below the thread is not optional. It gives chips somewhere to fall. Without that clearance, taps break — and tap breakage inside a blind hole means the part is scrapped.
| Feature | What to Specify | What NOT to Write |
|---|---|---|
| Through tapped hole | 4× M6×1.0 – 6H | "M6 tapped hole" |
| Blind tapped hole | Ø5.0 ↧15.0 / M6×1.0 – 6H ↧10.0 | "M6 × 10 deep" |
| PEM insert | 4× PEM CLS-M4-1 INSTALL NEAR SIDE | "Install M4 nut" |
| Countersink | Ø5.0 ⌵ Ø10.0 × 90° | "Countersink for M5 screw" |
Why Minimum Thread Engagement Matters
Tapping directly into thin sheet metal is only valid when the material is thick enough to produce at least three to four full threads of engagement. The rule is simple: sheet thickness must be at least 1.5× the thread pitch.
| Thread Size | Pitch (mm) | Minimum Tappable Thickness |
|---|---|---|
| M4×0.7 | 0.7 | 1.05 mm |
| M6×1.0 | 1.0 | 1.50 mm |
| M8×1.25 | 1.25 | 1.875 mm |
| M10×1.5 | 1.5 | 2.25 mm |
If your sheet is below these thresholds, you cannot tap directly. You need PEM self-clinching hardware 2 — and that decision must appear on the drawing before the quote goes out, not after first articles arrive.
Positional Tolerancing for Hole Patterns
A coordinate dimension like "25.0 ± 0.2 from datum A" creates a square tolerance zone. True position (GD&T) 3 creates a circular zone. For the same stated value, true position is 57% tighter. For bolt circles and mating hole patterns, use true position referenced to your datum scheme. This ensures all holes in a pattern are evaluated simultaneously against the mating part — not hole by hole in isolation.
How Can You Avoid Assembly Problems Caused by Unclear Post-Processing Requirements?
Our supply chain team has reworked countless shipments because an insert was pressed after powder coat, or a hole was tapped after plating. The dimensional damage is expensive. The schedule damage is worse. Both are 100% preventable with one paragraph of drawing notes.
Assembly problems caused by unclear post-processing requirements are avoided by specifying the correct operation sequence on the drawing — stating explicitly whether tapping, PEM pressing, or countersinking occurs before or after each surface finish step. Sequence errors destroy threads, crack coatings, and produce inserts that cannot be removed without scrapping the part.

PEM Insert Specifications: Get Every Field Right
The most common PEM error we see is a drawing that says "install M4 nut." That callout is useless. The correct format is a flagged leader note pointing to the installation hole:
4× PEM CLS-M4-1 INSTALL NEAR SIDE
The PEM part number is not decoration. It encodes three things: thread size (M4), shank length (matched to your sheet thickness), and material grade (carbon steel for CLS). Change any one of those three and the insert will not clinch correctly. Reviewing the manufacturer's self-clinching fastener installation dos and don'ts 4 before writing the callout can help catch these errors early.
Material Compatibility: Carbon Steel PEM Into Stainless Sheet
This is the most dangerous assumption in sheet metal design. Standard carbon steel PEM nuts (Type CLS) cannot be pressed into 304 stainless steel sheet. The hardness relationship reverses. The clinch geometry will not cold-flow. The insert looks seated but pulls out at a fraction of its rated load.
For stainless sheet, specify stainless-rated PEM types (CLS-SS or CLSS series). Add a drawing note alongside the PEM callout:
MATERIAL: 304 SS 1.5mm — VERIFY FASTENER COMPATIBILITY BEFORE INSTALLATION.
Chinese fabricators stock the most common carbon steel variants. Without an explicit prohibition on the drawing, they will substitute without telling you.
Installation Side: Near Side vs. Far Side
The clinch direction determines which face the insert head flushes against. This affects your assembly stackup, surface finish requirements on that face, and whether the insert head lands on a cosmetic surface. Omit the installation side callout and approximately half of first-article inserts will be pressed in backwards.
| Callout Element | Example | Why It Matters |
|---|---|---|
| Insert part number | PEM CLS-M4-1 | Encodes thread, shank length, material |
| Quantity | 4× | Counted against BOM |
| Installation side | NEAR SIDE / FAR SIDE | Controls clinch direction |
| Sheet material note | 304 SS 1.5mm | Triggers compatibility check |
The Process Sequence Note
Every drawing that includes PEM inserts, tapped holes, or countersinks must include a process sequence table or note. At minimum it should state whether each secondary operation happens before or after each surface finish step. Understanding how powder coating affects hole tolerances and thread clearance 5 is essential when writing these sequence notes. Examples:
- "TAP AFTER POWDER COAT" — required when coating buildup in the hole is acceptable
- "PEM BEFORE PASSIVATION" — inserts must be seated before chemical treatment
- "COUNTERSINK BEFORE ANODIZE" — geometry is set on the raw part
Without this note, different operators running different operations in the same shop will sequence the work based on habit. The most common result: inserts pressed after coating (destroying the coating around the hole) or holes tapped after plating (destroying thread tolerance).
Why Do Secondary Operations Affect Both My Lead Time and Unit Cost?
We quote parts every day that have four or five secondary operations after the main sheet metal forming. Buyers often see the machining cost and assume it is the biggest variable. It is not. Sequencing and inspection are where schedule and cost actually get lost.
Secondary operations such as tapping, PEM pressing, and countersinking add both time and cost because each operation requires a separate machine setup, a separate inspection step, and careful sequencing around surface finish processes. Poorly specified drawings force fabricators to stop and clarify, adding days. Incorrect sequencing forces rework or scrap, adding cost that is rarely recoverable.

Why Setup Time Matters More Than Machine Time
For low-to-medium volume custom parts, the machine time for a single tapped hole is measured in seconds. The setup — loading the correct tap, setting the depth stop, verifying the fixture — takes minutes. Multiply that by five thread sizes on one part and you have a significant cost driver. Clear, complete callouts let the shop plan all setups at once. Ambiguous callouts mean the operator stops, asks, waits for an answer, and restarts.
Countersink Angle: The Silent Cost Driver
The countersink angle is determined by your fastener standard 6. Metric DIN/ISO flat-head screws require 90°. Imperial ASME/ANSI flat-head screws require 82°. Chinese fabricators default to 90° for every metric drawing they receive. If you are designing to ASME conventions with inch fasteners and you do not explicitly state 82°, every countersink in your order will be cut at 90°. Your flat-head screws will sit proud. The entire part may need to be scrapped.
State the angle on every countersink callout:
Ø5.0 ⌵ Ø10.0 × 90°
Never assume the angle is implied by the fastener designation. It is not. Confirming which flat-head screw standard applies to your fastener 7 before writing the callout eliminates one of the most common and costliest first-article errors.
Bend Line Clearance: A Constraint That Must Be on the Drawing
Tapping and countersinking are performed on the flat blank before bending. Any feature that falls within the press brake die contact zone will be distorted during forming. The threads become unusable. The countersink seat warps and no fastener will seat flush.
Add a note to every drawing with secondary hole features:
NO TAPPED OR COUNTERSUNK FEATURES WITHIN [X]mm OF ANY BEND LINE.
The exact clearance value depends on your supplier's tooling. Confirm it during DFM review. Then put it on the drawing permanently.
The Fastener and Hardware Summary Table
When a drawing covers tapped holes, PEM inserts, and countersinks together, consolidate everything into one reference table in the drawing notes. This is not optional for complex parts going to a shop with multiple operators. It is the single most effective thing you can do to prevent sequencing errors.
| Feature Type | Spec | Qty | Sheet Thickness | Installation Side | Process Note |
|---|---|---|---|---|---|
| Tapped hole | M6×1.0 – 6H | 8 | 2.0 mm steel | N/A | Tap before powder coat |
| PEM insert | CLS-M4-1 | 4 | 2.0 mm steel | Near side | Press before powder coat |
| Countersink | Ø5.0 ⌵ Ø10.0 × 90° | 6 | 2.0 mm steel | N/A | Cut before powder coat |
This table is both a BOM excerpt and a process control document. Every operator running a secondary operation can find their row, confirm their spec, and confirm the sequence — without hunting through notes scattered across three views.
What Drawing Notes Help My Supplier Inspect Threaded and Inserted Features Correctly?
Our quality control team inspects threaded and inserted features on every shipment before it leaves the factory. The most common root cause of failed inspection is not a manufacturing error. It is an incomplete drawing that gave the fabricator nothing to inspect against.
Drawing notes that help suppliers inspect threaded and inserted features correctly include the thread tolerance class for go/no-go gauge selection, the PEM pull-out load requirement or reference to the manufacturer's specification, the countersink major diameter and angle as measurable callout values, and a true position tolerance on hole patterns referenced to a defined datum scheme. Without these, the fabricator has no pass/fail standard.

Thread Inspection: Go/No-Go Gauges Require a Tolerance Class
A thread is a go/no-go inspection 8 item. The gauge set must match the tolerance class on the drawing. The 6H tolerance class 9 is the standard choice for most metric fastener applications. If your drawing omits the tolerance class, the shop may use a gauge for a different class — and a thread that passes with the wrong gauge may not accept your mating fastener in assembly.
Write the tolerance class on the drawing. Write it every time. Do not assume it is implied by the thread designation.
PEM Pull-Out and Push-Out Strength
PEM publishes rated pull-out and push-out values for each insert family, sheet thickness, and material combination. Your drawing does not need to repeat these tables, but it should reference the PEM part number completely — because that part number is the key the inspector uses to look up the applicable specification. If the drawing says only "M4 self-clinching nut," there is no traceable specification for the inspector to verify against.
Countersink Inspection: Why Depth Is Not a Valid Callout
Some buyers specify countersink depth instead of major diameter and angle. This forces the fabricator to reverse-calculate the geometry — introducing an error source. More importantly, depth is much harder to measure accurately in a production environment. Major diameter can be measured directly with a caliper or optical comparator. Angle can be verified with a plug gauge. Depth requires a depth micrometer and a reference surface that may be distorted by the countersinking operation itself.
Always call out:
Ø5.0 ⌵ Ø10.0 × 90°
Not:
Ø5.0 COUNTERSINK 3.5 DEEP
The first callout gives the inspector two independent measurable values. The second gives one derived value that is difficult to measure and easy to dispute.
True Position vs. Coordinate Dimensions for Pattern Inspection
Hole patterns that mate with another part should carry a true position tolerance, not just coordinate dimensions. Here is why: coordinate dimensions evaluate each hole independently. True position evaluates all holes in the pattern simultaneously 10 against the datum scheme. A set of holes where each one is within its individual coordinate tolerance can still fail to accept a bolt circle if the errors happen to stack in the same direction.
For any hole pattern with two or more fasteners, add a true position callout referenced to your three-plane datum scheme. Let the fabricator inspect it correctly — and let yourself reject it correctly if it fails.
Conclusion
Clear drawings prevent expensive mistakes. Specify every thread callout with pitch and tolerance class, every PEM insert with its full part number and installation side, and every countersink with major diameter and included angle. Add a process sequence note and a hardware summary table. Your fabricator will have everything they need — and your inspector will have a standard to measure against.
Footnotes
1. Overview of metric screw thread standards, profiles, and tolerance classes. ↩︎
2. How self-clinching fasteners cold-flow into sheet metal for permanent, load-bearing installation. ↩︎
3. Explanation of GD&T true position tolerance zones and how they differ from ± coordinate callouts. ↩︎
4. PEM's official do's and don'ts for correct self-clinching nut installation to avoid press-in errors. ↩︎
5. How powder coating buildup affects thread clearance, hole diameter, and process sequencing decisions. ↩︎
6. Why 82° suits imperial fasteners and 90° suits metric, with consequences for specifying the wrong angle. ↩︎
7. Reference guide for standard countersink angles by fastener type, including DIN and ASME conventions. ↩︎
8. How go/no-go thread gauges work and when a no-go gauge is allowed limited thread engagement. ↩︎
9. Explains metric thread tolerance classes and why the tolerance class on a drawing determines gauge selection. ↩︎
10. Four reasons GD&T positional tolerancing outperforms coordinate ± tolerancing for inspectable hole patterns. ↩︎