Skip to main content Skip to footer
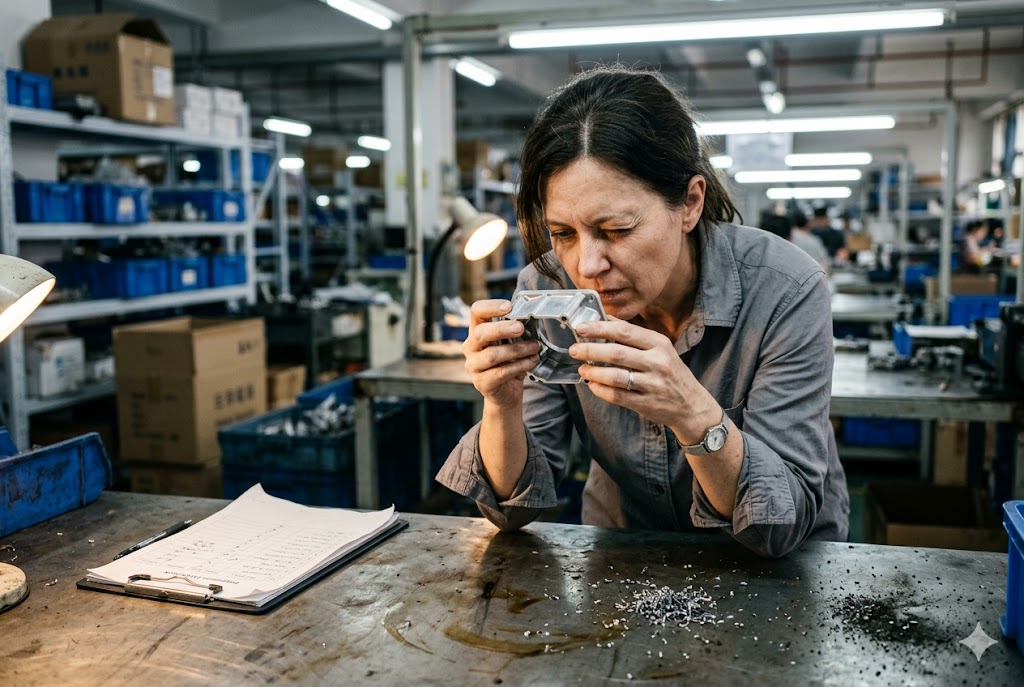
We have coordinated die cast sourcing across hundreds of projects, and the pattern is always the same: buyers get burned not by the defects they expected, but by the ones they never thought to check.
The most critical visual defects to inspect on imported die cast parts are flash and burrs at parting lines, cold shuts on flat faces, surface porosity near wall transitions, misruns at thin edges, flow marks on cosmetic surfaces, blisters caused by trapped gas, die soldering drag marks, ejector pin damage, sink marks on thick sections, and coating adhesion failures on finished parts. Catching these early prevents field failures and customer complaints.
Each of these defects is predictable. Once you know where to look, your inspection becomes faster and your supplier conversations become sharper. Flash and burrs at parting lines 1 are among the most common entry points for cosmetic rejections, while cold shuts on flat faces 2 represent a structural risk that is often mistaken for a surface scratch. Surface porosity near wall transitions 3 is the defect class most likely to cause coating failures after the part leaves the factory.
Should I Define My Cosmetic Standard Before I Review My First Samples?
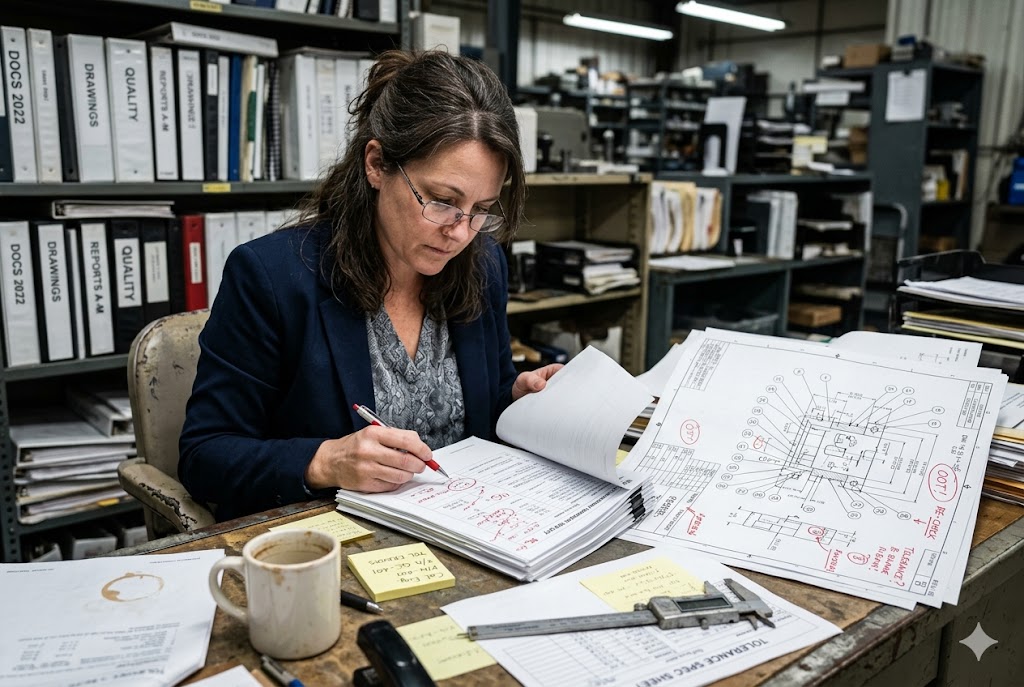
Every project we handle starts with the same question from our sourcing team before we even contact a factory: what does "acceptable" look like for this part? Without that answer in writing, sample reviews turn into arguments.
Yes, you must define your cosmetic standard before reviewing first samples. Without a written standard, your supplier has no target to hit, your inspector has no pass-fail criteria, and every sample review becomes a subjective negotiation. Setting the standard first saves rework cycles, reduces rejection disputes, and protects you during mass production.

Why a Verbal Standard Always Fails
"Good finish" means something different to every person in the room. A supplier in Ningbo and a purchasing manager in Ohio will draw the line in completely different places. That gap costs money.
A written cosmetic standard removes the gap. It defines zones, defect types, defect sizes, and acceptance levels for each zone. It gives your QC inspector a document to reference on the factory floor, not a memory of what you said on a video call three months ago.
How to Structure a Cosmetic Standard
Start by dividing the part into zones based on visibility and function. The NADCA Product Specification Standards for Die Casting 4 provide an industry-recognized framework that many buyers adapt when writing their own zone maps.
| Zone | Definition | Example Location | Typical Tolerance |
|---|---|---|---|
| A (Critical) | Visible to end user in normal use | Front face, top surface | Near zero visible defects |
| B (Major) | Visible only during assembly or maintenance | Side walls, interior faces | Minor blemishes acceptable |
| C (Minor) | Hidden in final assembly | Mounting flanges, back faces | Functional defects only |
For each zone, specify what defects are allowed, at what maximum size, and at what maximum frequency per unit area. Attach photo examples of borderline-acceptable and clearly-rejectable conditions. Your supplier needs to see those examples, not just read descriptions.
What to Include in the Document
Your cosmetic standard should cover at minimum:
- Part name, drawing number, and revision
- Zone map with clear boundary lines
- Defect definitions with photos for each defect type
- Accept/reject size limits per defect per zone
- Measurement method (raking light distance, magnification level)
- Inspection lighting condition (lux level, angle)
A simple one-page document with a zone photo and a defect photo library is far more effective than three pages of written description with no images.
Setting the Standard Before Tooling Approval
If you wait until the T1 sample to start this conversation, you have already lost leverage. The factory has spent money on tooling. They will push back hard on any cosmetic requirement that forces a tool modification. Define the standard before tooling is cut. Reference it in your purchase order and your tooling approval form. This makes it a contractual condition, not a preference you raise after the fact.
How Can I Distinguish Acceptable Appearance Variation from a True Defect?
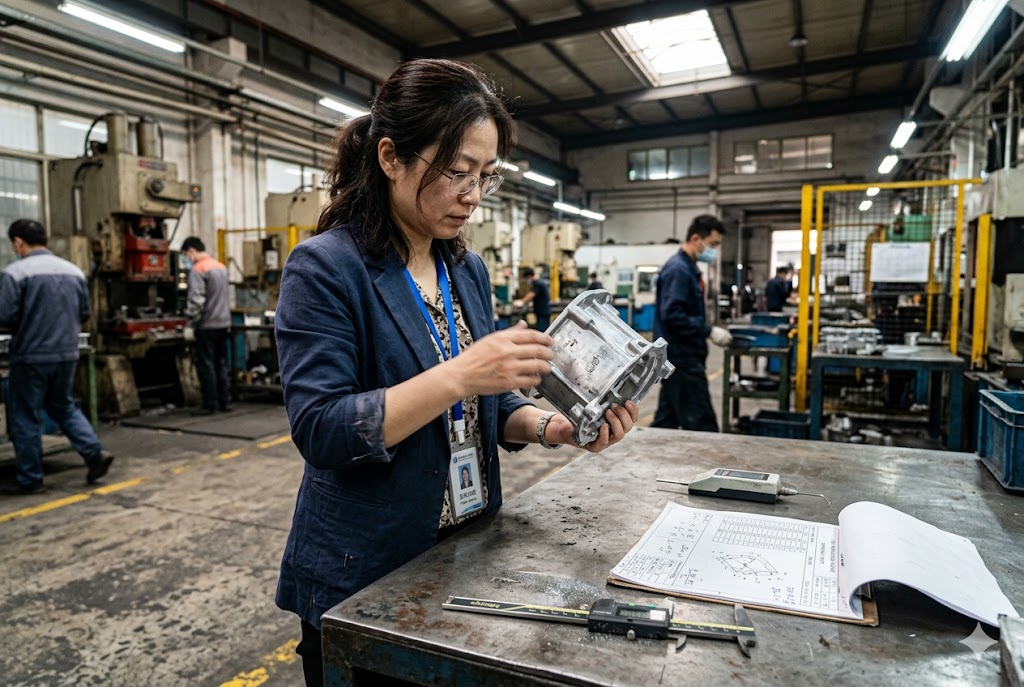
Our quality team spends a significant portion of pre-shipment inspection time on exactly this judgment call. The line between variation and defect is not always obvious, and getting it wrong in either direction is expensive.
Acceptable appearance variation is a difference in look that does not affect function, safety, or customer perception at normal viewing distance. A true defect is a condition that fails your documented cosmetic standard, creates a risk of failure in use, causes a downstream process problem, or will generate a customer complaint. The distinction depends entirely on your written criteria, not on general opinion.

The Core Test: Does It Matter to the End User?
Start with a practical question. Will a customer see it, feel it, or be affected by it in normal use? Apply that test zone by zone. A minor flow mark on a Zone C face that sits hidden inside an enclosure is variation. The same mark on a Zone A face that a customer handles daily is a defect under most cosmetic standards.
Common Sources of Acceptable Variation
Die casting is not a machining process. Surfaces produced directly from the die will always show some texture, minor witness lines from the tool, and slight color variation in untreated aluminum or zinc. These are process-inherent and are normal within limits:
| Variation Type | Usually Acceptable | When It Becomes a Defect |
|---|---|---|
| Slight surface texture from die surface | Yes, if within Ra spec | If texture is uneven or has sharp peaks that catch skin |
| Minor parting line witness mark (flush) | Yes, if within height spec | If raised above 0.2 mm or sharp enough to cut |
| Small ejector pin marks in Zone B/C | Yes, within depth spec | If cracked around the mark or raised above surface |
| Slight color variation in bare aluminum | Yes, if no coating | If coated and color shifts visible across batch |
| Minor flow line in Zone C | Yes, non-cosmetic zone | If on Zone A or causes customer-facing appearance issue |
Structural vs. Cosmetic Classification
This is the critical split. Some conditions look like minor cosmetic issues but are actually structural risks:
- A blister looks like a surface bump. Press it. If it is hollow, it is a subsurface void that will crack under load or during machining. That is a structural defect, not cosmetic variation.
- A sink mark looks like a smooth shallow depression. It indicates internal shrinkage porosity directly beneath. On a structural wall, that is a reject.
- A cold shut looks like a faint surface line. It represents an incomplete metal fusion. That is a structural discontinuity, not a scratch.
Train your inspectors to apply tactile checks alongside visual checks. A fingernail drag across a flat face reveals cold shuts that the eye alone misses under factory fluorescent light. For a complete walkthrough of how these defects behave in aluminum die casting inspection 5, including step-by-step testing protocols, independent inspection guides are worth reviewing before your first T1 review.
Use Raking Light as Your Primary Tool
Most cosmetic defects are invisible under flat overhead lighting. Hold a flashlight or a single directional light source at a low angle (roughly 15 to 30 degrees from the surface) and move it slowly. Every surface irregularity will cast a shadow and become visible. This is how your end customer will see the part in the field. If a defect only appears under raking light and your zone standard allows it, it passes. If it is clearly visible and fails your zone limit, it rejects.
What Visual Problems Can Create Customer Complaints Later Even If the Part Functions?
This is the question that matters most to the people buying from our clients. The part works. But customers still complain. We have seen this destroy repeat business for importers who thought they were delivering a good product.
Visual problems that generate customer complaints even on functional parts include surface blisters that crack open after installation, coating failures that appear under field lighting, ejector pin marks that feel sharp to users, cold shut lines that worsen after powder coating, flow marks visible at raking angles in the field, and parting line burrs that cut hands during assembly. These defects pass functional testing but fail at the point of customer contact.

Defects That Get Worse After Delivery
Some defects are stable when the part ships. They get worse in the field. These are the most dangerous for importers because they pass inspection, pass functional testing, and still generate warranty claims and customer complaints months later.
Blisters look like small dome-shaped bumps on the surface. They are caused by trapped gas beneath the skin of the casting. A blister that holds its shape during inspection will collapse or crack open when the part is subjected to heat, load, or vibration in service. Once the blister ruptures, it leaves a visible hole and often chips any coating around it. The root cause of blistering in high-pressure die casting defects 6 is well documented and traceable to specific process parameter failures.
Coating adhesion failures appear as fisheyes, bubbles, or peeling. They are caused by applying paint or powder coat over a substrate that is porous, incompletely cleaned, or has residual die release agent on the surface. The mechanism behind outgassing and powder coating defects 7 on die cast substrates is a well-documented failure mode: trapped gas expands during the cure cycle and ruptures the coating film from beneath. These failures are often invisible at the factory under flat fluorescent light. Under raking light or after thermal cycling in the field, the adhesion loss becomes obvious. This is one of the most common sources of importer customer complaints on painted die cast parts sourced from China.
Defects That Affect User Handling
| Defect | How Customer Encounters It | Typical Complaint |
|---|---|---|
| Flash and sharp burrs on parting line | Handling, assembly | Cut fingers, sharp edge |
| Raised ejector pin marks | Touch, assembly fit | Rough feel, assembly interference |
| Rough drag marks from die soldering | Touch on cosmetic face | Unacceptable surface quality |
| Broken blister on cosmetic face | Visual at installation | Obvious hole or chip in finish |
| Cold shut lines after coating | Visual under angle light | Visible seam line through paint |
The Problem with Factory Lighting
Most Chinese die casting factories inspect under flat overhead fluorescent lighting. This is the worst possible light for catching cosmetic defects. Flow marks, cold shuts, minor sink marks, and coating orange peel are all significantly harder to see under this condition. Your parts will pass factory QC and fail the moment your customer unpacks them next to a window or installs them under a task light.
Specify in your inspection protocol that cosmetic inspection must be performed under raking light at a defined distance (typically 50 cm for Zone A surfaces). This single requirement catches a large proportion of the cosmetic defects that factory inspectors routinely miss.
Why Flow Marks Predict Future Problems
A flow mark on a cosmetic surface is not just a visual issue. It tells you the supplier cannot control the metal flow front consistently. That process instability will produce variable cosmetic results across the production run. If you see flow marks on two out of ten T1 samples, you will see them on a proportion of every production batch until the process is corrected. Do not approve samples with flow marks on cosmetic surfaces unless the supplier can demonstrate the process correction that eliminated them.
How Do I Make My Appearance Criteria Clear to My Supplier?
This is where most buyers fail. They have a standard in their head. They describe it in an email. The supplier nods. Then the production parts look nothing like what was intended. We have learned to treat communication of appearance criteria as a separate deliverable, not a conversation.
To make appearance criteria clear to your supplier, you need four things: a written zone map on the part drawing, a defect photo library with accept and reject examples for each defect type, reference samples physically marked and approved, and an inspection protocol specifying lighting condition, viewing distance, and sample size. Written descriptions alone are never sufficient for cosmetic standards.

The Four-Document System
Our team uses a consistent set of documents for every cosmetic part we manage. Each document serves a different purpose and together they close the interpretation gap between buyer and factory. Structuring a robust pre-shipment inspection in China 8 process around these documents gives importers the leverage to catch and resolve quality issues before goods are loaded.
Document 1: Zone Drawing. Take the part drawing or a photograph and annotate it with zone boundaries. Label each zone A, B, or C (or equivalent). Send this as a PDF attachment to the purchase order. Reference it by name in the order terms.
Document 2: Defect Photo Library. Photograph actual defects on actual parts. For each defect type, include one photo of a clearly acceptable condition, one photo of a borderline condition, and one photo of a clearly rejectable condition. Label each photo clearly. This library removes ambiguity faster than any written description.
Document 3: Approved Reference Sample. Ship a physical part to the factory that represents the acceptable quality level. Mark it with a tag that states it is the approved cosmetic reference. Understanding the golden sample approval process 9 and what makes it legally binding in your purchase contract protects you when production quality drifts away from the approved standard. The factory inspector uses this sample to calibrate their eye on the production line. Reissue this sample if tooling is modified.
Document 4: Inspection Protocol. One page. States inspection method (raking light, lux level, distance), sample size per batch, AQL level 10 per defect class, and who signs off. This document tells both your inspector and the factory's QC team exactly how the inspection will be conducted.
How to Handle Supplier Pushback
Suppliers sometimes push back on cosmetic standards they consider too tight. Take that pushback seriously. It may mean the standard is genuinely unachievable at the quoted price. It may mean they have not produced parts at this quality level before. Either is important information before production starts.
Ask the supplier to show you samples from a current or past job at the quality level you are requiring. If they cannot, that tells you something. If they can, use those samples as a reference point for your discussion.
Do not reduce your standard because a supplier finds it inconvenient. Do reduce it if it is genuinely unnecessary for your application. Be clear on which reason applies before you make any change.
Building Criteria Into the Purchase Order
Your PO should reference your cosmetic standard by document name and revision number. It should state that the cosmetic standard is a contractual requirement and that nonconforming product will be rejected at your cost. This language protects you during disputes and signals to the supplier that you treat appearance as seriously as dimensional tolerance.
| Communication Method | Effectiveness | Risk If Used Alone |
|---|---|---|
| Verbal description on a call | Low | High — no record, open to interpretation |
| Written email description | Medium-Low | High — words differ across languages and experience |
| Zone drawing attached to PO | Medium | Medium — zones defined but no defect examples |
| Defect photo library | High | Low — visual reference reduces interpretation gap |
| Physical reference sample | Very High | Very Low — tactile and visual benchmark at the factory |
| All four combined | Maximum | Minimal — standard is unambiguous and enforceable |
Conclusion
Catching die cast visual defects early is not complicated, but it requires a system. Define your standard before tooling. Know the ten defect types. Use raking light. Send four documents, not one email. Get a reference sample on the factory floor. Do this on every project and your cosmetic rejection rate drops sharply.
Footnotes
1. Comprehensive guide to flash and burr causes, prevention, and IATF-certified inspection practices for die cast parts. ↩︎
2. Explains cold shut formation, visual identification methods, and process corrections used in die casting. ↩︎
3. Covers 22 casting defect types including porosity, shrinkage, and how to prevent them before shipment. ↩︎
4. Official NADCA specification document defining dimensional, cosmetic, and performance standards for die cast alloys. ↩︎
5. Step-by-step aluminum die casting inspection guide covering CMM testing, visual checks, and golden sample protocols. ↩︎
6. Details eight common high-pressure die casting defects including blistering, misruns, and die soldering with root causes. ↩︎
7. Industry expert explains how outgassing from porous die cast substrates causes powder coating bubbles and adhesion loss. ↩︎
8. Practical guide to conducting pre-shipment inspections in China using AQL sampling and supplier management best practices. ↩︎
9. Explains the golden sample approval process and how importers use it to lock in quality benchmarks before mass production. ↩︎
10. QIMA's AQL guide with interactive calculator, defect classification tables, and ISO 2859-1 sampling methodology explained. ↩︎